Creative Coding for VR in Unity
Unity 3D is a fantastic game engine with tons of great resources online to get you up and running in no time at all.
It is a framework I have enjoyed getting to grips with over the past several months but personally, I don’t identify myself as a games developer.
I am a creative that taught himself to code and I have a strong interest in VR which lead me to Unity.
Parts of what I create will be games or contain game-like experiences but I see VR as much more than this. I really get excited by the creative opportunities this new realm introduces and the potential for VR to be a game-changing technology for education, story-telling & artistic collaboration.
As you can imagine, most of the tutorials available for Unity are very much geared at game development alone which is why I was very pleased to discover this series by Rick Barraza.
With the explosion in popularity of Virtual and Mixed Reality devices this past year and HoloLens right around the corner, Unity has quickly transformed from an indie gaming platform to the cross platform solution for volumetric coding. However most tutorials don’t teach Unity this way, choosing to optimise around component driven game design concepts instead. This series presents Unity for procedural coders, makers, and creative engineers wanting to get up and running with volumetric programming in Unity fast.
Today’s blog post is to share the results of following this tutorial and show you the procedure I took / changes that had to be made to take it from a desktop experience into Virtual Reality.
I highly recommend you complete Rick’s tutorial first so you have an understanding of the scene that has been created.
I won’t cover the basics of enabling VR in your project as I alluded to this in my last blog post here and shared the relevant resource for the Oculus SDK.
Instead we’ll look at the following three additions I made to the project:
- Handling movement speeds with Time.deltaTIME
- Adjusting the full screen effects for an Oculus Camera Rig
- Introducing the Oculus Audio SDK for greater immersion
Time.deltaTime
This first change isn’t strictly VR specific but is an important step that Rick mentions he skipped for simplicity sake in his tutorial.
So what does Time.deltaTime do?
If you add or subtract to a value every frame chances are you should multiply with Time.deltaTime. When you multiply with Time.deltaTime you essentially express: I want to move this object 10 meters per second instead of 10 meters per frame.
In our example we have two values being changed every time our update loop is called. Our spin speed and our rotate speed.
If we were to times these by Time.deltaTime, instead of the distance of our movement happening once per frame it would take a whole second. This would obviously be far too slow so we could times it by 90 (this is the frame rate the Oculus Rift runs at) and we would be back to it being applied 90 times every second, only this time reliably instead of relying on frame rates which can fluctuate.
In my version I actually settled on multiplying them by 60 to slow the motion down a little.
// Update is called once per frame
	void Update () {
		this.transform.Rotate((spinSpeed * 60) * Time.deltaTime);
		this.transform.RotateAround(Vector3.zero, spinAxis, (rotateSpeed * 60) * Time.deltaTime);
	}
Full Screen Effects
The tutorial series ended with two full screen effects being added to the scenes camera for some extra polish.
One of these was a depth of field effect and the other some bloom.
Depth of Field should be avoided in VR as the current headsets don’t support eye-tracking, meaning realistic depth of field that follows where you focus is out of the question.
This doesn’t matter so much when you’re viewing a 2D screen and is in fact a great tool photographers and film-makers use to draw your attention to focus points in an image or scene but in VR it’s a real immersion breaker.
Bloom however can still be used assuming your scene can afford the CPU cost of the effect.
To apply it to The Oculus Camera rig though it’s not as simple as dropping the effect on our prefab. We have to apply it to each eye that gets rendered and sent to our headset.
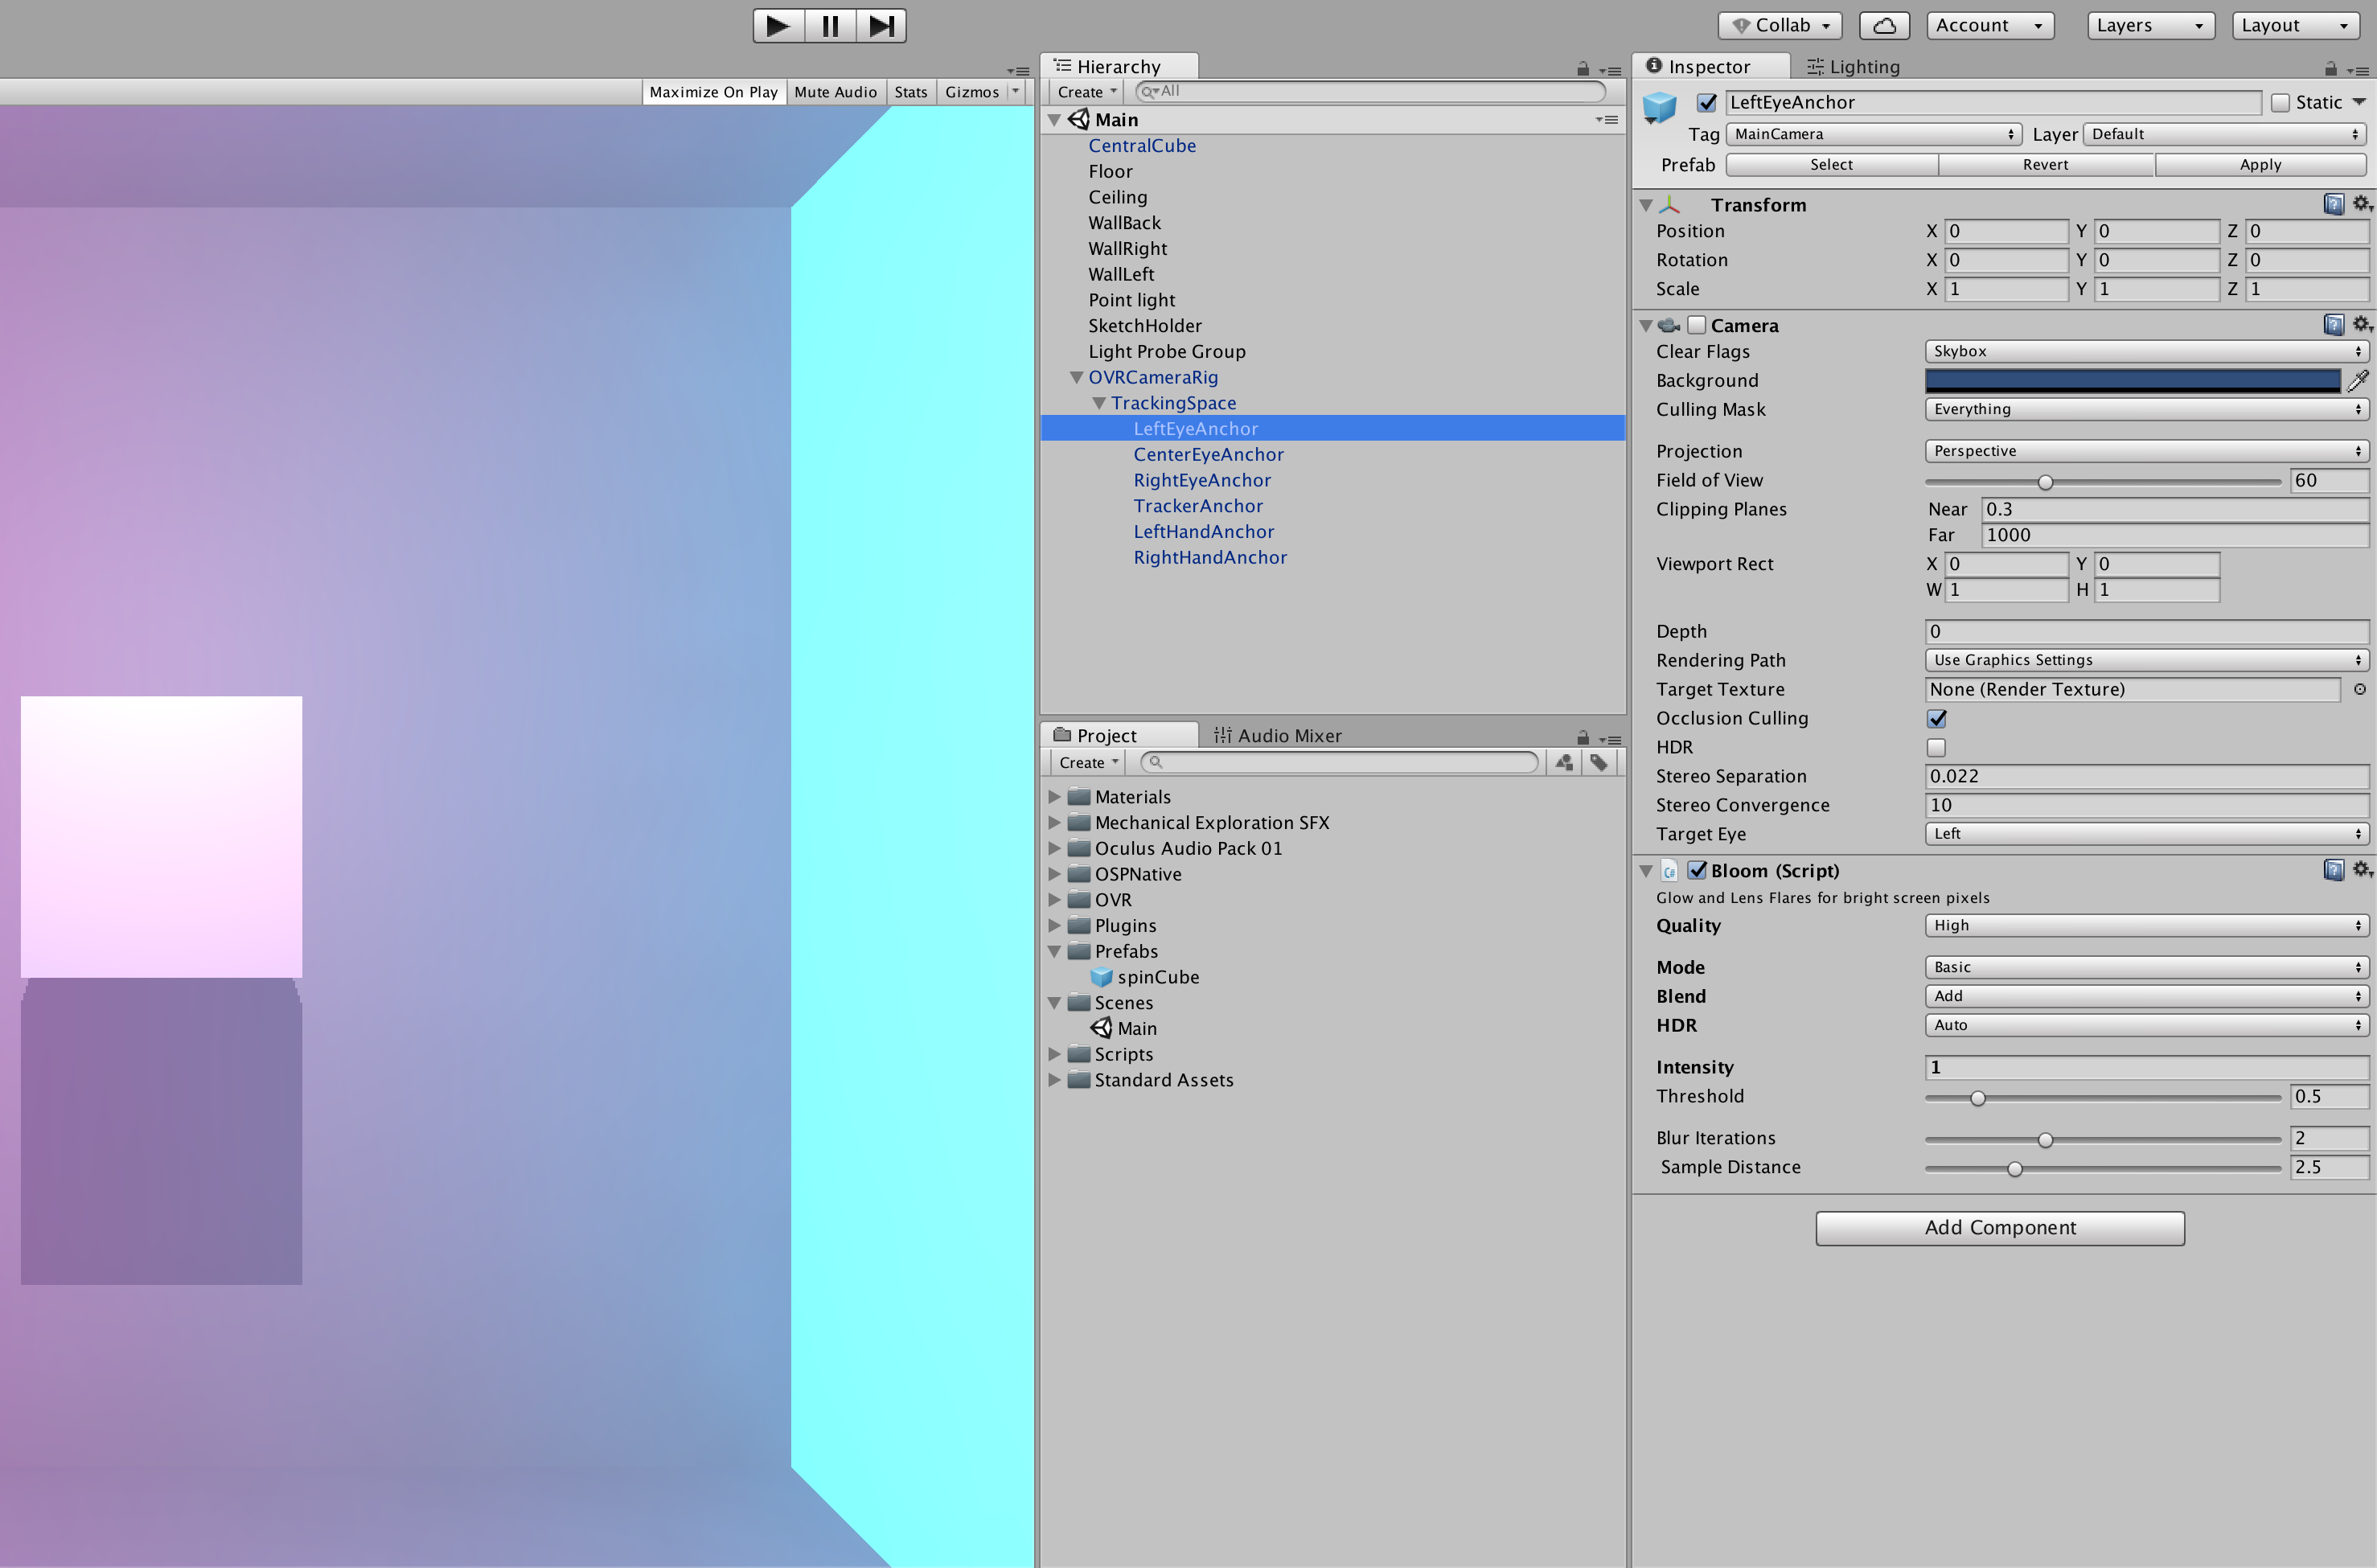
The CenterEyeAnchor is the view you will see in your Unity game tab when playing your scene or fullscreen on your desktop monitor in a production build whilst the LeftEyeAnchor and RightEyeAnchor are the cameras that are actually being rendered to each eye in your headset.
Simply apply the bloom effect script to each of these and you’re good to go.
This should also demonstrate why full screen effects can be so expensive when developing for VR as you’re actually running three different instances of it. The same goes for everything else in your scene which is why optimisations become so important.
Oculus Audio SDK
One of the key components to creating immersive environments in VR is sound.
We can’t just throw some sound effects on a stereo track and be done with is as you need to be able to distinguish where different sounds are coming from and pinpoint them with accuracy as in real life.
Oculus and unity have made this surprisingly easy for us and after installing the Audio SDK it only took a few simple steps.
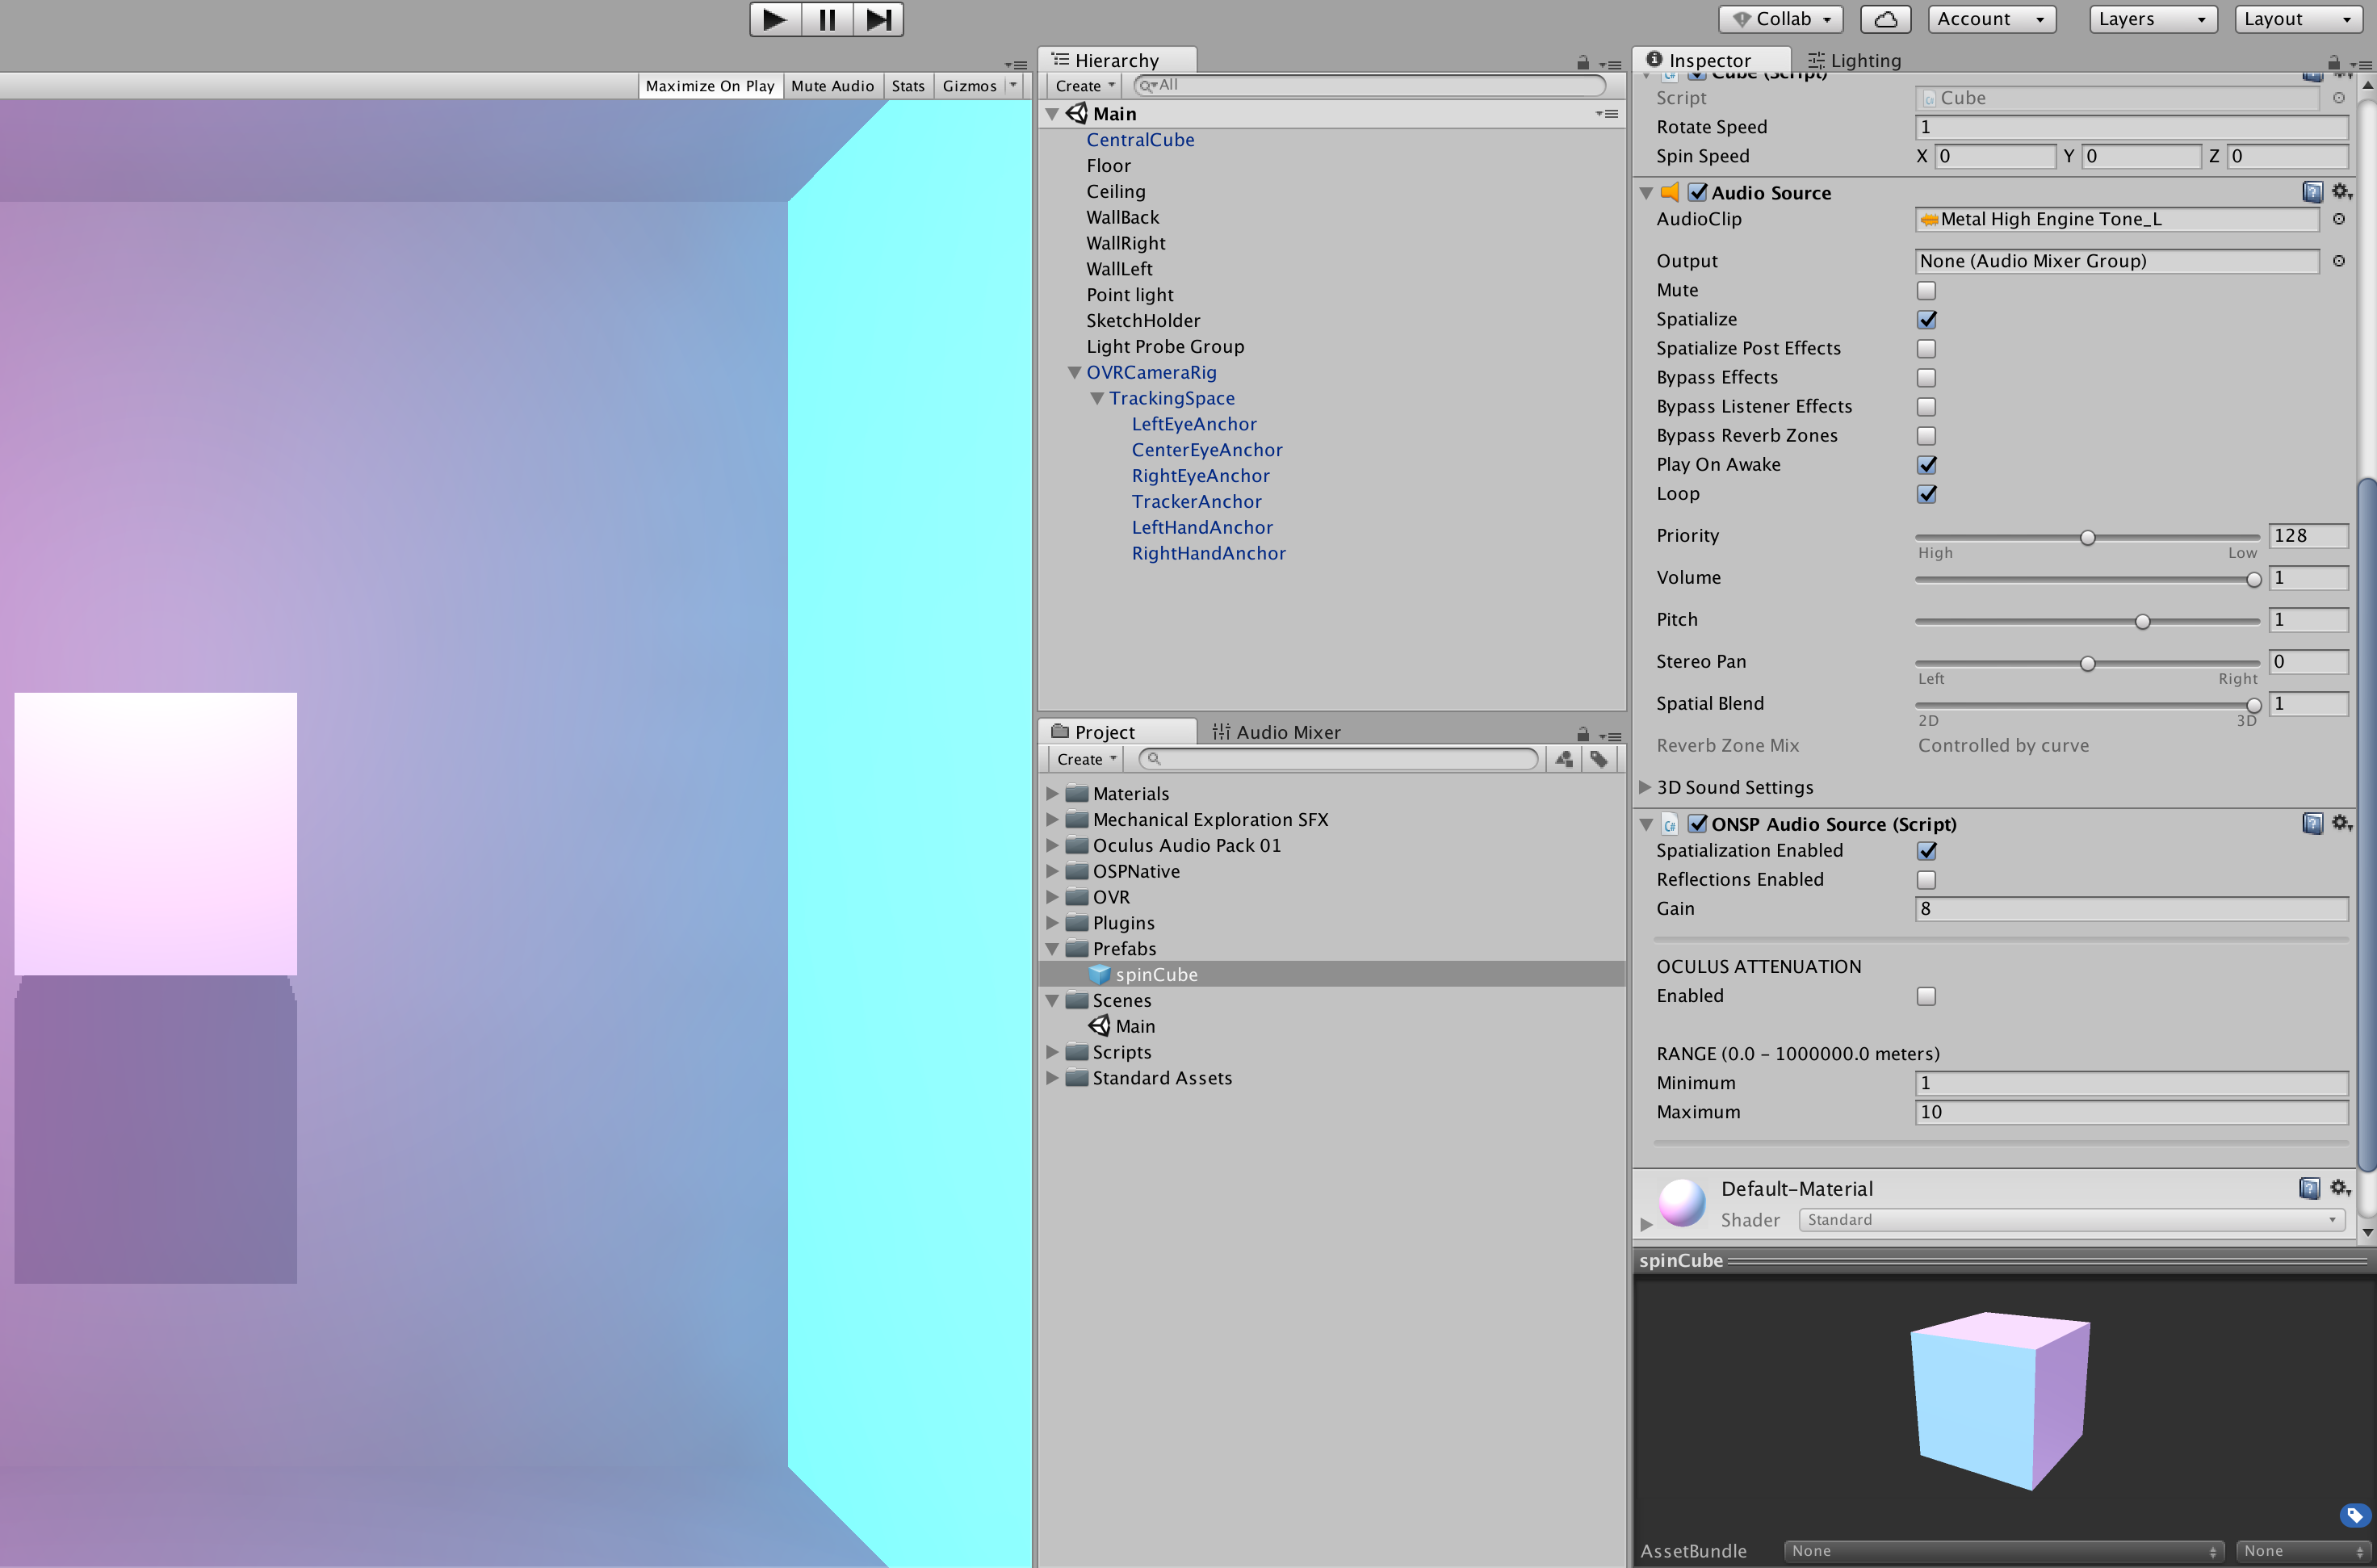
The first is to enable the SDK by going to Edit > Project Settings > Audio Manager and selecting OculusSpatializer as your Spatializer Plugin.
Second is to add a Unity Audio Source to your spinCube prefab and check the spatialize box.
I used the Metal High Engine Tone which came with the free Mechanical Exploration SFX pack on the asset store.
I had to convert the sample to Mono first though which you should always do when dealing with audio samples for VR.
Lastly we add Oculus’s ONSP Audio Source script to the same prefab and again check Spatialization Enabled.
And that’s that. Now when we play our scene and experience it in VR we can here each cube emitting it’s own audio source which moves throughout the space as they rotate.
You might not be able to here the effect as clearly in the video as when using a headset but the most pronounced moments are when all the cube align and slingshot around the centre at once before spreading out again.
There is obviously far more the Oculus Audio SDK can do but for the purpose of this experiment I found this simple method sufficient.
Were I to continue with this project(sketch??) I think the next thing I’d do is add some interactivity.